Getting Started
Table of contents
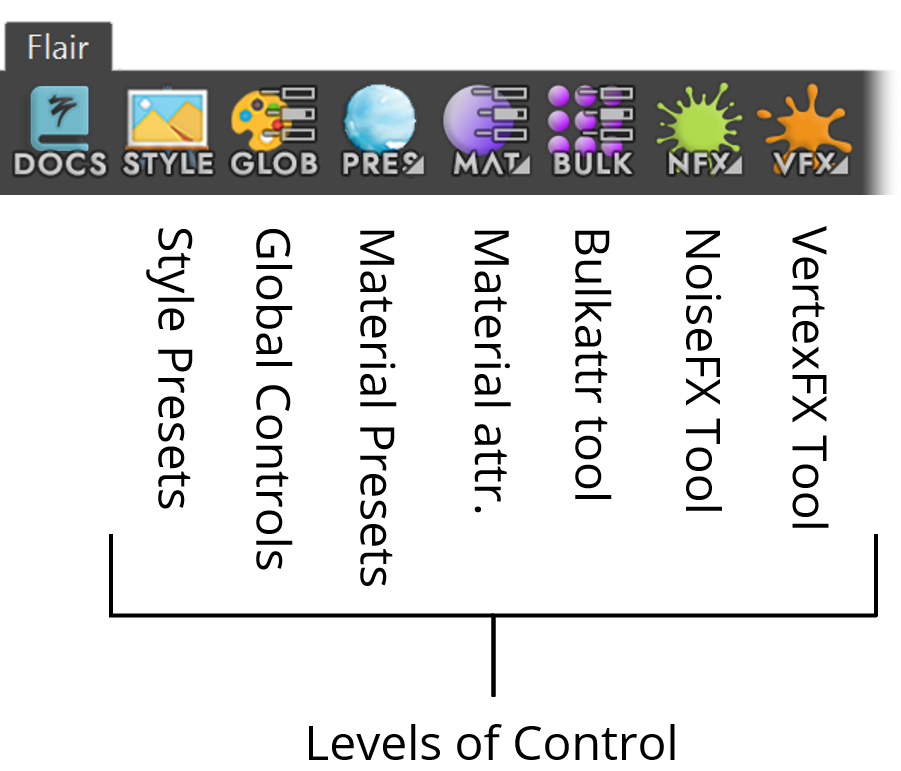
Flair workflow
Flair is all about controlling and art-directing a stylized render, so its workflow revolves around using tools at each level of control to cover most of the interaction spectrum.
Different levels of control allow you to customize the render from the highest level of control (affecting the entire image) down to the lowest level of control (affecting an individual pixel) to achieve your vision.

An ideal workflow follows this order, setting the global style first (high level of control) and continously diving deeper into localized effects (low level of control). However, it is also common to bounce around different levels of control, especially during exploratory phases.
This ideal workflow is also encouraged through the Flair shelf, where all the tools for Flair are found.
The art-direction at each level of control is bound to the 3D scene. However, one can easily export and import the art-direction across scenes using the Import/Export tool.
Each level of control is introduced in the sections below, click on the hyperlinks to open the documentation of the different tools.
Style presets and global control
At the top level of control are Style Presets (STYLE button in the Flair Shelf), which allow to quickly change the style that Flair is running.
Style Presets save and load predefined attributes (parameters) of the Flair globals node.
The Flair globals node (GLOB button in the Flair Shelf) contains every global attribute available in the engine and active style. Being globals, these attributes usually affect the entire image.
Material presets and material control
At the top of the mid-level of control are Material Presets (PRES button in the Flair Shelf), which allow to quickly create or change the materials of selected objects or components.
Material Presets save and load predefined attributes from the painterly Flair Shader and proxy materials.
The Flair Shader node (selected by clicking on the MAT button in the Flair Shelf on selected objects/components) contains all shader attributes. These values are applied on all objects that share the same material.
Painterly materials are crucial to develop styles that do not conform to physically-based photorealistic styles.
By not being constrained to photorealism, the same material can look completely different even under the same lighting conditions. However, painterly materials still need to work in unison to form a coherent look. For this purpose, you can change attributes of multiple materials at the same time using the Bulk Attribute tool (BULK button in the Flair Shelf).
Our custom materials can also drive style effects procedurally through the use of NoiseFX.
NoiseFX
The NoiseFX tool (NFX button in the Flair Shelf) allows to control effects procedurally from within the material. When used subtly, the tool can quickly produce natural-looking fluctuations within effects.
Mapped control
The lowest level of control is mapped control, which are parameters mapped onto objects either at the vertex- (VertexFX) or texture-space level.
VertexFX
The VertexFX tool (VFX button in the Flair Shelf), allows to paint effects onto the 3D objects at the vertex level (effects are assigned per vertex). The tool can provide meticulous local control over the style.
Proxy control
In parallel to all levels of control are Proxies (created by loading the _proxy material preset: PRES button in the Flair Shelf). Proxies are invisible objects that control your style.
Geometry proxies can take the form of arbitrary 3D objects i.e., spheres, complex objects or planes. All proxies can be placed in your scene to control and stylize whatever is behind them. Their usage in 3D is versatile, as they can be placed onto a small part of your scene, or over the entire scene, in the form of a filter plane.
All controls combined
All different levels of control, when art-directed correctly, can reflect your unique vision.
Dive deeper
Make sure to continue Getting Started by opening and reading the pages below: