Flair Shader
Table of contents
The Flair Shader material was developed to meet most painterly shading requirements, support art-direction and render the necessary AOVs (Arbitrary Object Values i.e., normals, motion vectors…) in real-time. Built from scratch using the Maya API, it was conceived for artists, offering features only when needed.
A Flair Shader material has two types of ‘attributes’: Settings and normal Attributes.
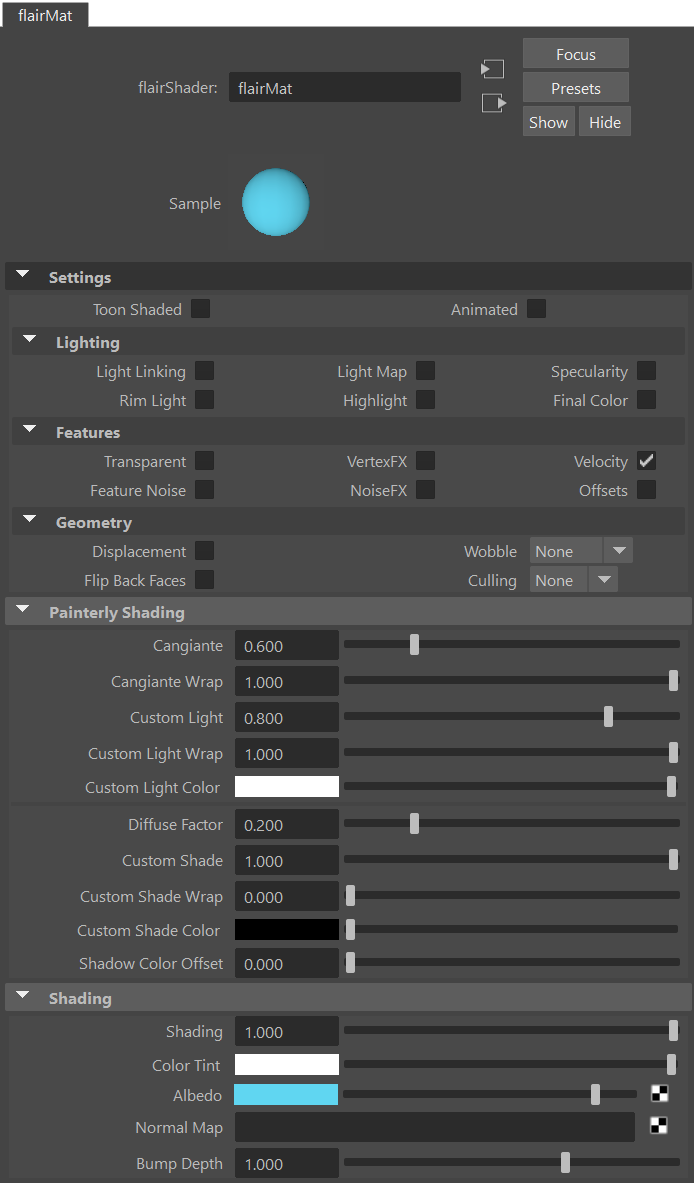
The first section of a Flair Shader material within the attribute editor, provides the Settings that allow to enable/disable what features the material should have. Therefore, we document the default material Attributes first.
Painterly Shading
Painterly shading attributes focus on bringing colors into the foreground of shading control and work differently than most attributes found in PBR materials. This doesn’t mean that they can’t be combined with normal Shading parameters, but they require 3D artists to go back to thinking in terms of colors and light. The first group of attributes control the color in the lit parts of objects, whereas the second group of attributes (from Diffuse Factor onwards) control the color in the shade of objects.
Painterly shading attributes are baked onto albedo AOVs and can’t be separated for compositing purposes.
Cangiante
Cangiante illumination changes the hue of the lit area towards a brighter and saturated related color. This attributes can also be used to enhance the color of any applied Albedo.
Cangiante Wrap
Cangiante Wrap defines the area of effect for the Cangiante illumination attribute.
Custom Light
Custom Light changes the color of the lit area towards the Custom Light Color.
Custom Light Wrap
Custom Light Wrap defines the area of effect for the Custom Light attribute.
Custom Light Color
Custom Light Color defines a custom color used by the Custom Light and Highlight attributes.
Diffuse Factor
Diffuse Factor defines the amount of diffuse shading within the material. 0 will be flat shading (entirely lit), 1 will be completely diffuse.
For scenes that require strong contrasts in shading (e.g., at night), keep the Diffuse Factor close to 1.
Custom Shade
Custom Shade changes the color of the shade area towards the Custom Shade Color.
Custom Shade Wrap
Custom Shade Wrap defines the area of effect for the Custom Shade attribute. It behaves like the Custom Light Wrap, but for the shade of an object.
Custom Shade Color
Custom Shade Color defines a custom color used by the Custom Shade and Shadow Color Offset attributes.
Shadow Color Offset
Shadow Color Offset offsets the shadow color of a light to the Custom Shade Color.
Shading
Shading attributes focus on common attributes found in materials, including various uses of texture mapping for different shading effects.
Shading
Shading defines the amount of shading within the material. 0 will be flat shading (entirely unlit), 1 will be shaded. It’s the opposite of Diffuse Factor and won’t affect lighting from Light Maps.
Color Tint
Color Tint defines a custom tint color. It is especially useful when mixing an additional color to the albedo color or textures. The color tint will multiply with the albedo to tint it accordingly. So, leave the color tint white if you only want the color of the albedo texture.
Albedo
Albedo contains the raw colors of the object, without any lighting information. Use a plain color or click on the checkerboard icon to select a texture.
Albedo textures with an alpha channel will only show transparency if the Transparent setting is activated. Any albedo transparency will be overriden if you specify a custom transparency map or alpha mask.
Normal Map
Normal Map is a texture which contains normal inclination deviations of the surface in the red and green channels, adding geometric detail without using polygons. Click on the checkerboard icon to select a texture.
Bump Depth
Defines the intensity of the normal inclinations in the Normal Map.
Settings
Additional material attributes for optional features can be created on-demand by enabling different settings.
Setting attributes are found in the first section of the Attribute Editor. Most settings are disabled by default, as to avoid unnecessary computations and clutter for artists. When needed, enabling settings will show the necessary attributes in the Attribute Editor, any copied tabs thereof, and in the Property Editor of the Hypershade window.
Toon Shaded
The Toon Shaded setting activates toon/cell shading. Toon shading within Flair separates the reflectance of light into three regions i.e., shade, mid and light region. Each region can be controlled through the toon shading attributes in the Attribute Editor.
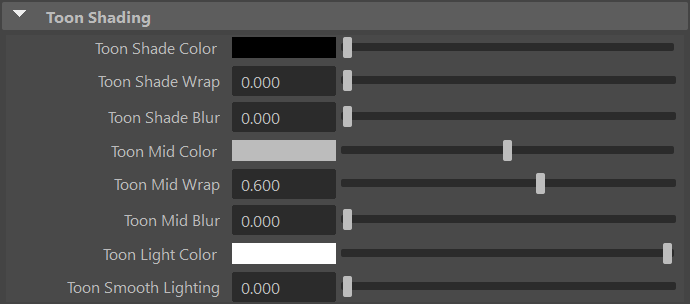
Toon Shade Color
The Toon Shade Color defines the color of the shade toon region.
Toon Shade Wrap
The Toon Shade Wrap defines the area of effect for the toon shade region.
Toon Shade Blur
The Toon Shade Blur defines the softness between the shade and mid toon regions.
Toon region blur can also be controlled locally with VertexFX and NoiseFX, by enabling the Toon Toolset: Fair Toolbox -> Toon Settings -> Toon Toolset.
Toon Mid Color
The Toon Mid Color defines the color of the mid toon region.
Toon Mid Wrap
The Toon Mid Wrap defines the area of effect for the toon mid region.
You can use the Toon Mid Wrap attribute to reduce toon shading to only two regions instead of three.
Toon Mid Blur
The Toon Mid Blur defines the softness between the mid and light toon regions.
Toon Light Color
The Toon Light Color defines the color of the light toon region.
Toon Smooth Lighting
The Toon Smooth Lighting smoothly interpolates toon lighting of various light sources
Animated
The Animated setting bakes the current position of vertices so that effects that rely on the 3D positions can stay in place when objects are deformed/animated. If this setting is not enabled, features like NoiseFX or FeatureNoise would float around in 3D space and not move with the objects.
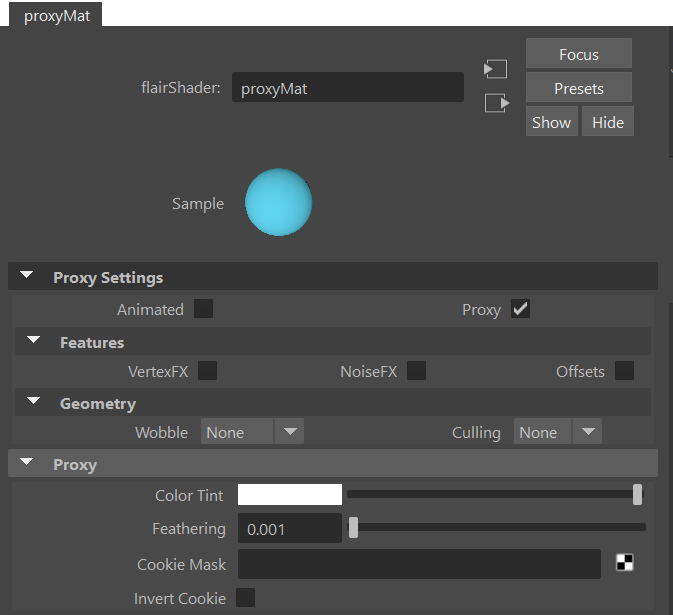
Proxy
Flair 1.2
The Proxy setting changes the behavior of the flairShader material to become a proxy. When toggled, the objects assigned to the material become invisible and most of the available attributes in the Attribute Editor change. This is the normal behavior, as proxy materials do not render color, but effect controls. This means that any 3D mesh can become an art-direction tool!
As this is a behavioral change and a powerful art-direction tool, you can read more about it in the dedicated proxy material page.
Lighting
This group contains all settings affecting lighting within the material.
Light Linking
The Light Linking setting toggles the ability to link lights within the material. This will allow Windows->Relationship Editors->Light Linking to work within the viewport. Keep in mind that allowing this on all materials can impact performance depending on how many lights you have in the scene.
Light Map
The Light Map setting activates the use of light maps within the material and toggles light map attributes in the Attribute Editor.

Light Map File
Light maps are grayscale texture maps that add light to the material (white is light). These can be baked from offline renderers, painted with VertexFX or assigned procedurally through NoiseFX. Click on the checkerboard icon to select a texture.
Shade in Light Map
If this attribute is enabled, Light Maps will add both light and shade to the object. White 1.0 will add light, neutral grey 0.5 won’t add anything, black 0 will add shade to the object.
Specularity
The Specularity setting activates the use of specular reflectance models within the material and toggles the attributes in the Specularity section.
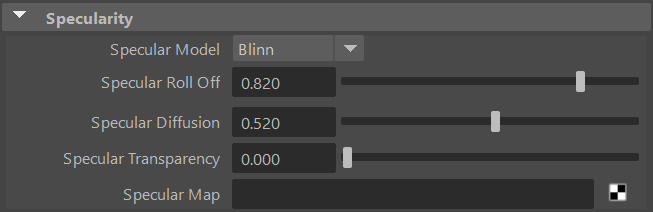
Specular Model
The specularModel setting defines the shading algorithm used by the Flair Shader material for specularity (shininess). A shading algorithm dictates how light is reflected along the surface of the object.
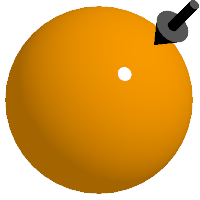
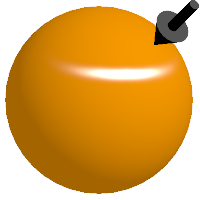
Depending on the specular model, different attributes will appear in the Specularity section.
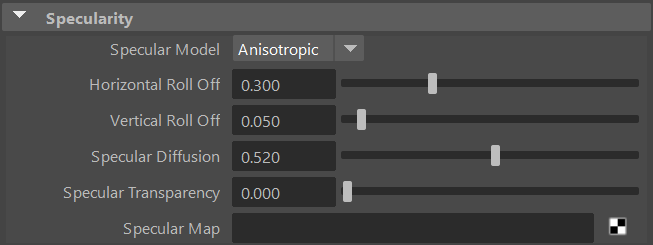
Roll Offs
Specular Roll Off, Horizontal Roll Off and Vertical Roll Off define the size of the specular highlight.
Specular Diffusion
Specular Deffusion defines how diffuse or sharp a specular highlight is.
Specular Transparency
Specular Transparency defines the transparency of the specular highlight.
Specular Map
Specular Maps are greyscale texture maps which mask the specularity within the material. Otherwise, the specularity will be even throughout the material.Click on the checkerboard icon to select a texture.
The specularity within the specular map is encoded within the intensity (white values) of the texture. White is specular, grey is semi-specular, black is diffuse.
Rim light
The Rim Light settings activates the use of 3D rim lighting effect around the silhouette of objects on areas facing the light or opposite to it.
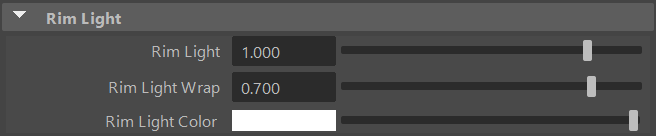
Rim Light Intensity
Rim Light controls the intensity of the rim light. Positive values adds the rim light, whereas negative values subtracts it.
Rim Light Wrap
Rim Light Wrap defines the area of effect of the rim light in either the lit or shaded areas of the object.
Rim Light Color
Controls the color of the rim light. The color is additively blended on top of the underlaying shading.
Highlight
The Highlight setting activates the use of highlights to generate a sharp highlight with the Custom-Light Color.
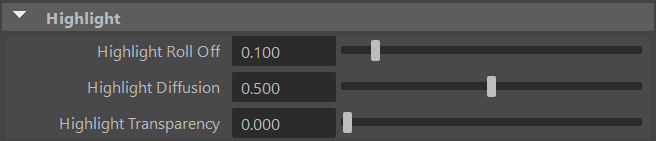
Highlight Roll Off
Highlight Roll Off defines the size of the highlight in the lit area of objects.
Highlight Diffusion
Highlight Diffusion defines how diffuse (blurred) the highlight should be.
Highlight Transparency
Highlight Transparency defines the transparency of the highlight.
Final Color
The Final Color setting makes the albedo its final color. Objects assigned to a final color material are not affected by lighting or the Atmosphere Color attribute that is set in the globals node. This allows you to use just the color, disregarding what is happening around them.
Features
This group aggregates various features affecting the type of data that the material renders.
Transparent
The Transparent setting activates the use of transparency and alpha masks in the material and toggles the attributes in the Attribute Editor.
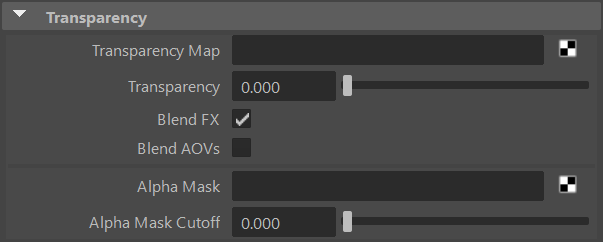
Transparency Map
Transparency Map is a greyscale texture which embeds the semi-transparency of the material. Click on the checkerboard icon to select a texture.
As with Alpha Masks: white is opaque, grey values are semi-transparent, black is transparent. The darker the value of the Transparency Map, the more transparent the material will be.
Transparency
Transparency defines the overall semi-transparency of the material.
Blend FX
Blend FX defines if the control masks of effects (NoiseFX, VertexFX) should blend with transparency or not.
Blend AOVs
Blend AOVs defines if AOVs (depth and normals) should blend with transparency or not. This attribute also shows the AOV Blend attribute, which helps to blend AOVs further so that effects can look better on semi-transparent objects.
AOV Blend
AOV Blend, which only appears appears once Blend AOVs is enabled, defines how much the AOVs should blend. A value of 0 will make the AOVs (depth and normals) of the material dissapear, while a value of 1 will blend AOVs as much as the color.
Alpha Mask
Alpha Mask is a black and white image which embeds the alpha of the material. Alpha masks are binary and can only distinguish between opaque or fully transparent (white is opaque, black is transparent). Click on the checkerboard icon to select a texture.
Use the alpha masks if you want cast shadows to respect the transparency.
Alpha Mask Cutoff
The grayscale value at which the Alpha Mask is transparent. Defines the threshold/boundary of the alpha mask in case there are grey values.
VertexFX
The VertexFX setting toggles the control of effects through vertex colors. The attribute is automatically enabled by Flair and is toggled as soon as you start painting with the VertexFX tool.
Velocity
The Velocity setting activates the calculation and rendering of motion vectors by the material. However, velocity will only be calculated if the VelocityPV global is enabled.
Velocity is enabled by default, but it can be deactivated per material if motion vectors are not required.
Feature Noise
The Feature Noise setting toggles the fractalized dynamic 3D noise that is used for certain sheder effects such as hatching, fray and sketch lines. Because it is dynamic, the feature noise will always be of the same pixel size, no matter how close or far the camera is from objects. When enabled, a new section within the Attribute Editor appears with attributes to customize the feature noise per material.
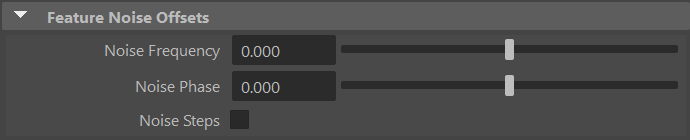
Noise Frequency
Offsets the Feature Noise frequency within the material.
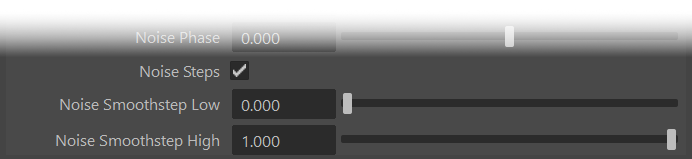
Noise Phase
Offsets the Feature Noise phase within the material.
Noise Steps
Adds control over the noise smoothsteps to change the appearance of feature noise by toggling two additional attributes underneath: Noise Smoothstep Low and Noise Smoothstep High.
To visualize the appearance of the feature noise in the viewport, use the Pass Inspector (PASS in the Flair shelf) and change the Active Target to featureNoiseTarget.
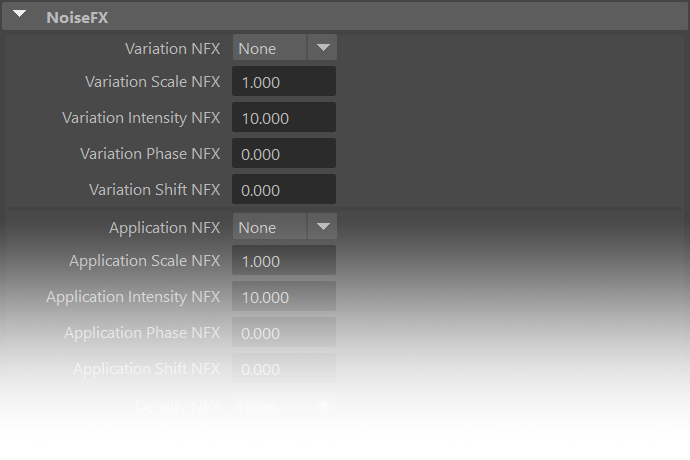
NoiseFX
The NoiseFX setting toggles the use of NoiseFX in the material and enables the NoiseFX section at the bottom of the Attribute Editor. NoiseFX is generally toggled automatically when the NoiseFX tool is used and allows you to key and animate NoiseFX attributes when needed.
Offsets
The Offsets setting toggles the available offsets per material and the respective section within the Attribute Editor. The effects of these attributes will only be visible on effects and styles that work with thresholds and depth i.e., lines (toon and sketch).
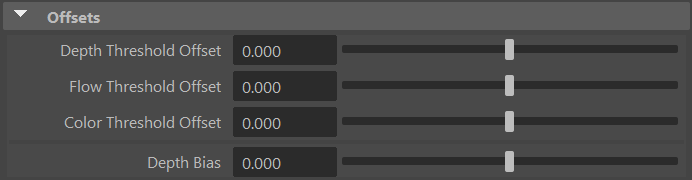
Depth Threshold Offset
Depth Threshold Offset modifies the global depth threshold for this material
Flow Threshold Offset
Flow Threshold Offset modifies the global flow (normals) threshold for this material
Color Threshold Offset
Color Threshold Offset modifies the global color threshold for this material
Depth Bias
Depth Bias offsets the depth of objects assigned to the material to help fix potential depth-based artifacts with overlapping geometries.
Geometry
This group contains all attributes changing the geometry of the material.
Displacement
The Displacement setting activates the use of displacement within the material and toggles the attributes in the Attribute Editor.
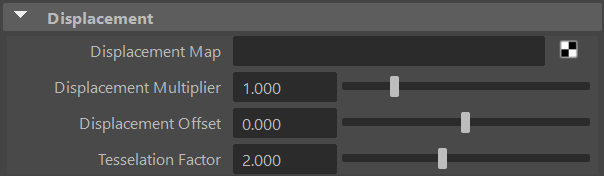
Displacement Map
Displacement Map is a greyscale texture which embeds the displacement in the form of a heightmap. Click on the checkerboard icon to select a texture.
Displacement Multiplier
Displacement Multiplier defines the amount of displacement to use. The higher the value, the more displacement there will be.
Displacement Offset
Displacement Offset offsets the displacement inward, so that displacement can be inside and outside of the object.
Tessellation Factor
Tessellation Factor defines the amount of subdivision within each polygon. The higher the factor, the more polygons are subdivided, giving more points to displace. There is no magic number, so you will need to find out how much tessellation is enough for your displacement purposes depending on the topology of each model.
Wobble
The Wobble setting activates the use of wobble offsets within the material and toggles its attributes in the Attribute Editor. These material attributes offset the global wobble values set in the globals node, so make sure to enable and set the wobble effect globally first.
Different types of wobble noise can be specified for different results
- None - No wobble is applied
- Simple - Default simplex wobble noise
- Cloud - More detailed fractalized wobble noise resembling the “cloud” noise in Photoshop (better appreciated at a higher polygon count).
- Custom - Custom noise, which can be written in glsl
flair/maya/shaders/material/include/noise.glsl[customNoise3(vec4 v)].
Once the wobble attribute has been enabled globally, material presets will default as wobbled (Simple).
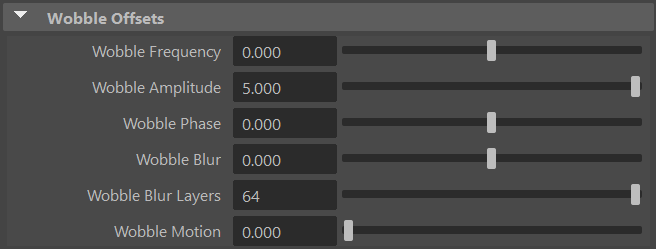
Wobble Frequency
Offsets the regularity of the wobble. A higher frequency will make the wobble more “irregular”, whereas a lower frequency will make it more “regular”. The frequency is directly linked to the global World Scale.
Wobble Amplitude
Defines the amount of wobble. A higher amplitude will deform more than a lower amplitude. The amplitude is directly linked to the global World Scale.
Wobble Phase
Defines the form of the wobble. Useful when you want a different wobble deformation or want to vary the wobble on a frame-by-frame basis.
As wobble is generated from noise in 3D, make sure to toggle the deformed attribute in materials if they are animated/deformed so that the wobble is baked in place.
Wobble Blur
Defines the amount of wobble blur for TAA samples, generating a soft edge by averaging different wobble positions as layers.
Wobble Blur Layers
Defines the amount of wobble blur layers i.e., the amount of wobbled positions to use during the wobble blur.
With a low layer amount, you can use Wobble Blur to achieve a layered watercolor look!
Wobble Motion
Defines the amount of motion offset of the wobble, generating streaks of motion under animation. For this attribute to show its effect, make sure that velocity is enabled in the Globals node and in the material.
Flip Back Faces
The Flip Back Faces setting flips the normals of faces that are pointing away from the camera view. This is useful to obtain better results from single polygon objects like tree leaves.
Culling
The Culling setting defines which faces should be culled within the material.
- None - No culling, all objects with the material are rendered as double sided.
- Front - The front-facing faces are going to be culled, only rendering the back faces.
- Back - The back-facing faces are going to be culled, only rendering front-faces. This can help performance on objects with many polygons.
Advanced
Modifying the shader source code
You may edit the source code of the material should you need to. The GLSL source files can be found in the Flair directory under /maya/shader/material. Please reach out on Discord to guide you further and learn what was missing for you. Maybe we can also help implement things for you.