Hatching and Stippling shader styles
Table of contents
Style breakdown
The hatching shader style emulates traditional hatching animation in 3D. While the hatching style contains tightly-packed lines to depict shading on objects, the same shader style can also be used to emulate stippling when the hatching length is set to 0 (zero).
This shader style depends on a custom material, which can be assigned onto any poly object. The material generates 3D noise that can be fractalized, maintaining its pixel size, disregarding the distance to the object. That way the size and density of the noise is preserved–never becoming too small or too big. When the fractalized noise is stretched along the object’s flow (curvature), stipples become hatches that follow the surface of the object.
In this page, we only document global attributes specific to the hatching shader style. To learn more about other global attributes, please see the globals node documentation.
This style is still in early development. If you wish for us to refine it further for your production, contact us and let’s work together to develop exactly the requirements for your look and pipeline.
Attributes
A series of hatching and stippling attributes are provided within the globals node to control and refine the hatching shader style.
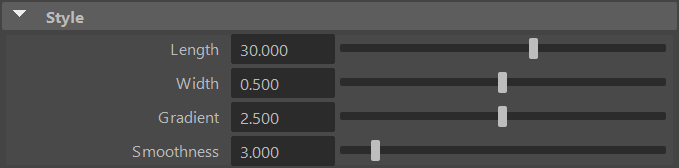
Length
Length of the hatching lines. If set to zero, produces a stippling effect.
Width
Average width (thickness) of the hatching lines in pixels. A width of zero is invisible.
Gradient
Controls the extent of the diffuse lighting gradient. A value of zero results in a binary shading style.
Smoothness
Smoothes the vector field used to orient the hatching lines. Higher values produce less abrupt changes in orientation.
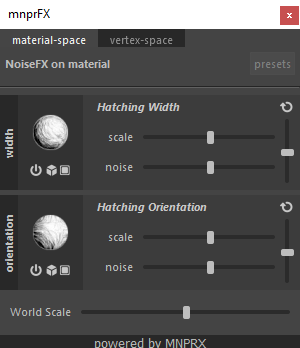
Art-direction
The width and the local orientation of the hatching lines can be art-directed procedurally with NoiseFX and/or locally by painting with VertexFX.
Considerations
Attach hatching/stippling onto objects
Activate the Deformed attribute within the materials to bake the fractalized noise onto animated objects.
Jittering
You can reduce jittering present in hatches and stipples by narrowing down the near and far clip planes within the Maya camera shapes.
Rendering at different resolutions
Hatching is currently sensitive to the resolution that you are working/rendering with. For best (consistent) results, try to keep the working resolution close to the rendering resolution.
Nurbs surfaces
Nurbs surfaces can’t save any data in vertex colors, so hatching/stippling won’t stick onto the objects and it won’t be possible to use VertexFX on them.
Art-directable Attributes
Attributes labeled as art-directable can be controlled further with NoiseFX, VertexFX and proxy materials.