Shader Node
Table of contents
The shader node is the most powerful and most used node in the Flair graph. Each shader node is bound to a GLSL shader source code, which can be accessed and defined by right-clicking on the node and selecting Edit shader....
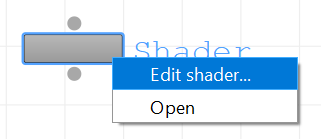
When editing the shader, the Shader Dialog window will appear, which is documented below.
Shader Dialog
The shader dialog contains the GLSL shader source code. The source code can be either written directly in the interface or loaded from an external source file.
We recommend writing shaders in separate files and loading them onto the shader node. That way you can take advantage of advanced text-editing tools that Flair is not meant to replace.
The dialog is separated in two sections. The upper section (1, 2, 3) provide the functionality to load external GLSL source files for the shader node. The lower section (Source, onwards) shows the loaded shader source code. The breakdown of each element of the interface is found below.
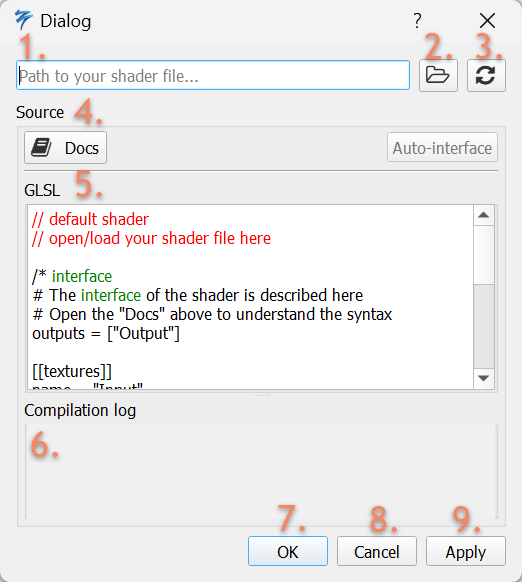
- Contains the path to the shader source file (if any). This will be either relative to the Flair installation or absolute.
- Opens a File Dialog to select an external source file.
- Reloads the source file to get the latest source updates.
Docswill open the browser with this documentation.- The current GLSL source code, either written directly or loaded from an external source file.
- The compilation log shows when there have been problems compiling the interface or GLSL source code.
Okwill apply and close the dialog.Cancelwill discard any changes and close the dialog.Applywill save any changes and keep the dialog open.
Recommended workflow
- Load the external Flair shader source file (or reload in case the correct path is set)
- Check for compilation logs and fix the source when needed.
Applythe changes- Refresh the viewport to show the changes.
Now that you know how to load and apply shaders we can dive deeper into shader writing in Flair.