Licensing server
Flair 1.2
Table of contents
A licensing server can be used to Relay Flair licenses through a local network, floating the licenses between artists when needed. These licenses work well when artists need to share licenses or in air-gapped or otherwise offline environments.
Floating licenses are available when purchasing multiple Flair STUDIO or INDIE for Education licenses. Get in touch with our sales team for more information on purchasing floating licenses.
License distribution
The Flair Relay licensing server distributes the available licenses to whichever node claims it, be it an artist workstation or a computer in the farm in headless mode.
All Maya/Flair instances (sessions) opened on the same node share a claimed license. So if an artist has 5 Maya sessions open using Flair on their workstation, they are only using one Flair license.
Licenses are claimed the moment the Flair plugin loads, so make sure to turn off Auto load within the Plug-in Manager (Windows -> Settings/Preferences -> Plug-in Manager -> flairEngine) so that licenses are not automatically claimed even though they are not in use. The Flair plugin auto-loads whenever it is required by a node in the scene or a tool within the Flair Shelf.
Claimed licenses are released in two ways:
- Once the last instance of Flair in a node is closed by either unloading the plugin or closing Maya where the Flair plugin was loaded.
- The relay server doesn’t receive a heartbeat from the node within 60 seconds.
Once released, the license is free to be claimed by a new node again.
Setup
Once you receive the Flair Relay files from us, follow the steps below to setup the licensing server.
- Make sure the server has a human-readable hostname or a static IP address within your network
- Extract the
Flair Relayfiles into a folder on the server machine. - Open that folder within the Terminal or PowerShell.
- Run
./relay serveto start the floating license sever. - (Optional) Relay will be served on port
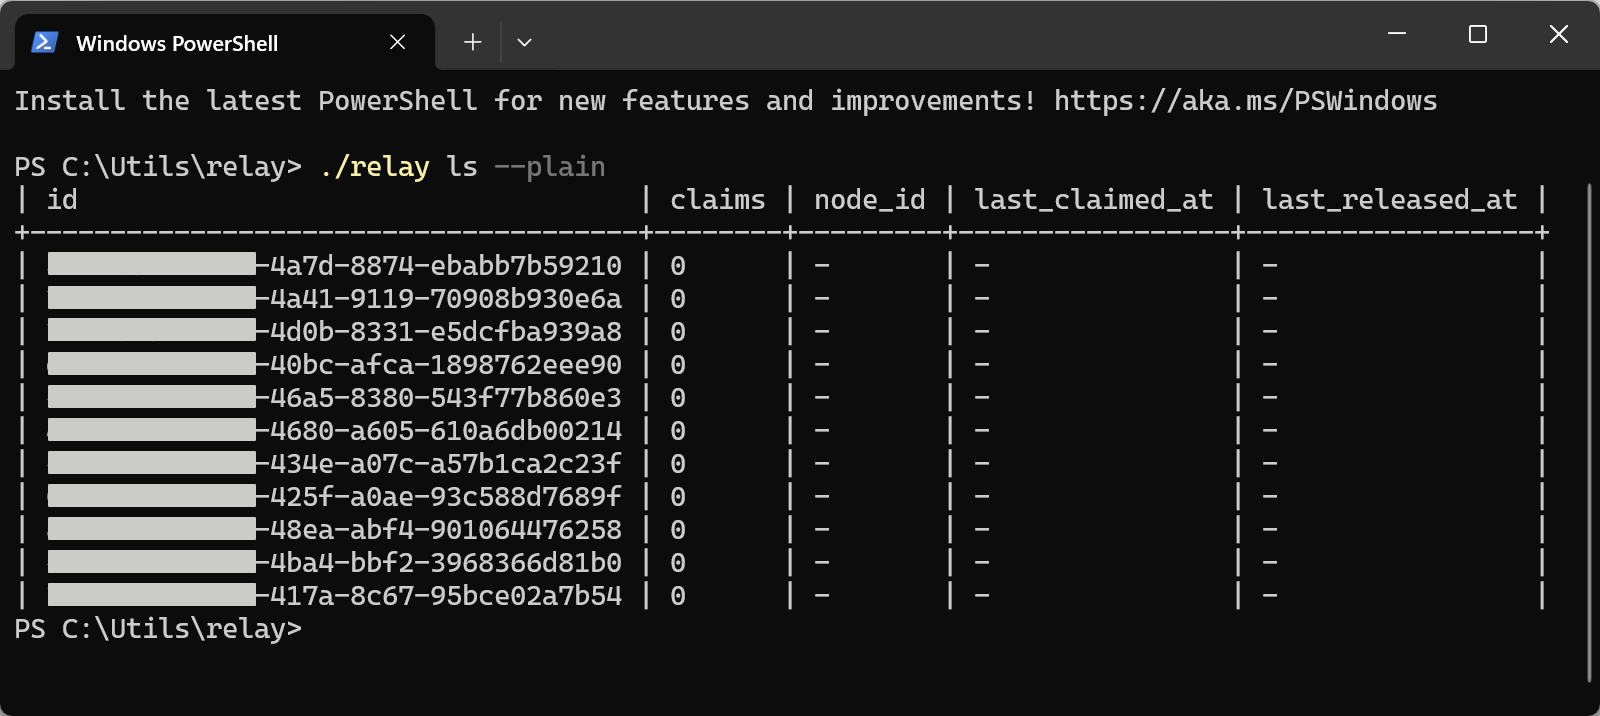
6349by default. To define a custom port, serve by specifying the port:./relay serve --port ####. - Open another Terminal/PowerShell in the same folder and run
./relay ls --plainto check the status of the server.
Adding firewall rules
Relay will need to be permitted through the firewall of the server machine for computers on the network to connect to it. Contact your network administrator so that they can configure the firewall for your environment.
Below are some basic instructions for Windows, macOS and Linux, but these may be quite different depending on how your environment is setup.
On Windows
Add a program exception
- Go to Settings → Privacy and Security → Windows Security →
Firewall and Network Protection - Click on
Advanced Settings - Navigate to
Inbound Rulesand click onNew Rule... - Select
Programand click onNext > - Choose
This program path:,Browse...to the folder where relay is located and double-click onrelay.exe. Click onNext >to continue. - Choose
Allow the connectionand click onNext > - Select all the checkboxes that apply to the rule. Domain, Private, and Public and click on
Next > - Specify a name for the rule e.g.,
Flair Serverand click onFinishto complete the process
On macOS
Usually, a prompt will appear asking if you want the application “relay” to accept incoming network connections. When prompted, press on Allow.
If this does not occur, you can manually add an exception as follows:
- Open the
Apple menu -> System Settings... - Go to
Network -> Firewalland click onOptions... - At the bottom of the list on the left, click on the
+button - Select the
relayapplication from the folder where you have placed the Flair relay files
On Linux
-
Check what firewall zone your Linux server is operating in
1
firewall-cmd --get-active-zones -
(Optional) Change the zone your Linux server is operating in for your interface (which you know from the previous command).
1
 sudo firewall-cmd --permanent --zone=work --change-interface=eth0
-
Run this command to allow incoming traffic on the relay port for your configured zone (work in this case)
1
2
 sudo firewall-cmd --permanent --zone=work --add-port=6349/tcp
 sudo firewall-cmd --reload
Troubleshooting
Test communication with Relay
Once the relay server is running, you can check if it is reachable with curl
On Windows (PowerShell)
1
& curl.exe -v -X GET "http://SERVERNAME:PORT/v1/health"  ## HTTP/1.1 200 OK
On macOS and Linux
1
curl -v -X GET "http://SERVERNAME:PORT/v1/health"  ## HTTP/1.1 200 OK
If host cannot be reached, check your firewall configuration and enable the necessary ports.
Setting a hostname
On Windows
- Open Settings (
Win + I) - Go to System > About
- Click Rename this PC
- Enter a new name and restart your computer
On macOS
- Open the
Apple menu -> System Settings... - Go to
General -> Sharing - Under Local hostname click on
Edit... - Enter a new name and restart your computer
On Linux (RHEL 7+)
Run the following command where NEW-HOSTNAME is the new hostname of the server
1
sudo hostnamectl set-hostname NEW-HOSTNAME